How To Build A Leads Tracker Chrome Extension

I am a frontend developer from Nigeria, who is interested in networking and learning from people of great minds. Also available for both remote and on-site job opportunites.
TABLE OF CONTENTS
- Introduction
- What are Chrome Extensions?
- What does a Leads Tracker Chrome Extension do?
- Prerequisite
- How to build a Leads Tracker Chrome Extension
- Creating a manifest file
- Deploying our extension
- Conclusion
1. INTRODUCTION
I recently started learning javascript on scrimba and one of the projects was to build a leads tracker chrome extension. I learned a lot while building this extension, the tutorial was interactive, I understood a lot of concepts better and also how to apply them. In this article, I'm going to walk you through how to build a leads tracker chrome extension and how to deploy your extension to get it working. If you're someone that enjoys video tutorials, you can go ahead to check out the tutorial video on the Learn JavaScript for free course on scrimba. I hope you enjoy this article.
2. WHAT ARE CHROME EXTENSIONS?
Chrome Extensions are software programs that enable users to customize their Chrome browsing experience. They are built on web technologies such as HTML, CSS, and JavaScript. When installed into Chrome, they change its functionality by adding new features or altering the existing behavior of the program itself to make it easier for the user. Chrome extensions offer a wide variety of extra functionalities such as blocking ads from being displayed, adding to-do lists or notes to Chrome, password management, leads tracking, and a lot more. You can check here for how to add, remove and disable an extension in Chrome.
3. WHAT DOES A LEADS TRACKER CHROME EXTENSION DO?
A leads tracker Chrome extension is a Chrome extension that enables you to save websites/webpages URLs and keep track of them for future references. This extension allows you to save links and sites with great lead potentials. An example is LinkedIn. You can save and keep track of your connections using this extension, click on your connection's profile, open your leads tracker extension, and click on the save tab button. The webpage URL is saved, and you can always find it whenever the extension is open.
The save tab button saves your current tab's URL, the save input button enables you to add the description of your URL or save any URL which is not your current tab, and the delete all button deletes all saved tab URLs and inputs.
4. PREREQUISITE
Basic knowledge of HTML and CSS
Basic knowledge of JavaScript
5. HOW TO BUILD A LEADS TRACKER CHROME EXTENSION
Now that we know what Chrome extensions are and what a leads tracker Chrome extension does, let's build one.
- HTML Markup
For the HTML markup, we'll create an input box element and three different buttons. We'll also create an unordered list that renders out our leads (we'll implement this using JavaScript). Our markup is going to look like this:
<!DOCTYPE html>
<html lang="en">
<head>
    <meta charset="UTF-8">
    <meta http-equiv="X-UA-Compatible" content="IE=edge">
    <meta name="viewport" content="width=device-width, initial-scale=1.0">
    <link rel="stylesheet" href="style.css">
    <title>Lead Tracker Extension</title>
</head>
<body>
    <input type="text" id="input-el">
    <button id="input-btn">SAVE INPUT</button>
    <button id="tab-btn">SAVE TAB</button>
    <button id="delete-btn">DELETE ALL</button>
    <ul id="ul-el"></ul>


    <script src="index.js"></script>
</body>
</html>
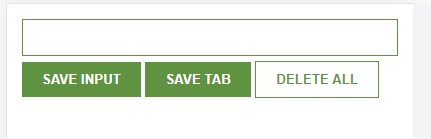
Output:

- CSS
Next, we're going to style our extension using CSS. You can check out my styling below. You can also add your styling.
* {
    margin: 0;
    padding: 0;
    box-sizing: border-box;
}
body {
    padding: 15px;
    min-width: 400px;
    font-family: Arial, Helvetica, sans-serif;
}
input {
    width: 100%;
    padding: 10px;
    margin-bottom: 5px;
    border: 1px solid #5f9341;
}
button {
    padding: 10px 20px;
    background-color: #5f9341;
    color: #fff;
    border: none;
    font-weight: bold;
}
#delete-btn {
    border: 1px solid #5f9341;
    background-color: #fff;
    color: #5f9341;
}
ul {
    list-style: none;
    margin-top: 20px;
}
li {
    margin-top: 5px;
}
a {
    color: #5f9341;
}
Output:
- JavaScript
Now that we've styled our extension, we're going to write a few lines of JavaScript to add functionalities. To add functionalities to our extension, we're going to be working with variables which are used to store data, functions which allow a code to be called many times without repetition, and the DOM (Document Object Module which allows us to create, change or remove elements from a document. Click on each of them to read more.
The JavaScript code written to add functionalities to our leads tracker extension is shown and explained below:
// Storing data and elements into variables
let myLeads = [];
const inputEl = document.getElementById("input-el");
const inputBtn = document.getElementById("input-btn");
const ulEl = document.getElementById("ul-el");
const deleteBtn = document.getElementById("delete-btn");
const tabBtn = document.getElementById("tab-btn");
//To retrieve leads from the local storage
const leadsFromLocalStorage = JSON.parse(localStorage.getItem("myLeads"));

//To prevent the leads from disappearing when the page is refreshed or when our browser is closed
if (leadsFromLocalStorage) {
    myLeads = leadsFromLocalStorage
    render(myLeads)
}

//Making our SAVE TAB button work
tabBtn.addEventListener("click", function() {
    //grabbing the url of the current tab
    chrome.tabs.query({active: true, currentWindow: true}, function(tabs) {
        myLeads.push(tabs[0].url)
        localStorage.setItem("myLeads", JSON.stringify(myLeads))
        render(myLeads);
    })
})

//Rendering out the leads in the unordered list, using for loop and template strings
//This function is called in multiple places
function render(leads) {
    let listItems = "";
    for (let i = 0; i < leads.length; i++) {
    // using template strings
    listItems += `
        <li>
            <a target='_blank' href='${leads[i]}'>
                ${leads[i]}
            </a>
        </li>
    `
    };
    ulEl.innerHTML = listItems;
}

//Making our DELETE BUTTON work so it clears all leads from the local storage when clicked
deleteBtn.addEventListener("dblclick", function() {
    localStorage.clear()
    myLeads = []
    render(myLeads);
})

//Pushing the values from the input field
inputBtn.addEventListener("click", function() {
    myLeads.push(inputEl.value);
    //to clear out the input field after saving a lead
    inputEl.value = "";
    //To save the leads to the local storage
    localStorage.setItem("myLeads", JSON.stringify(myLeads));
    render(myLeads);
})
6. CREATING A MANIFEST FILE
Now that we're done building our extension, we'll need to create a manifest.json file. This file describes our extension to the browser.
Here's a snippet below:
{
    "manifest_version": 3,
    "version": "1.1",
    "name": "Leads tracker",
    "action": {
        "default_popup": "index.html",
        "default_icon": "icon.png"
    },
    "permissions": [
        "tabs"
    ]
}
7. DEPLOYING OUR EXTENSION
Yaaay!🤩, now we're set to deploy our extension and get it working. This was an exciting part for me because I got to use my extension to track my leads (yes, I've been using the extension since I built it). I hope you're excited too because you get to use your extension also😁.
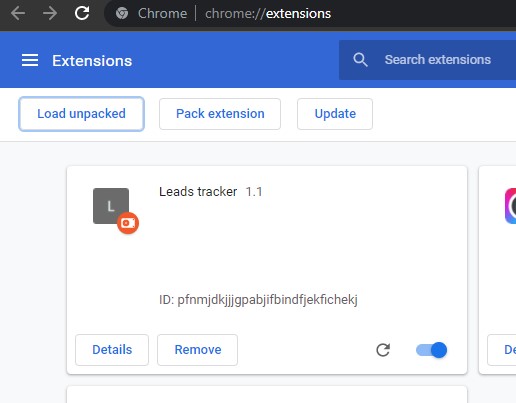
To deploy the extension, click on the extension icon in your browser and select manage extensions. On the extensions page, select load unpacked, and choose the folder with the extension codes.

After choosing the folder, you click on select folder, your extension gets deployed and you find it on your Chrome extensions page. Make sure you toggle on the button, to enable you to find the extension in your browser.
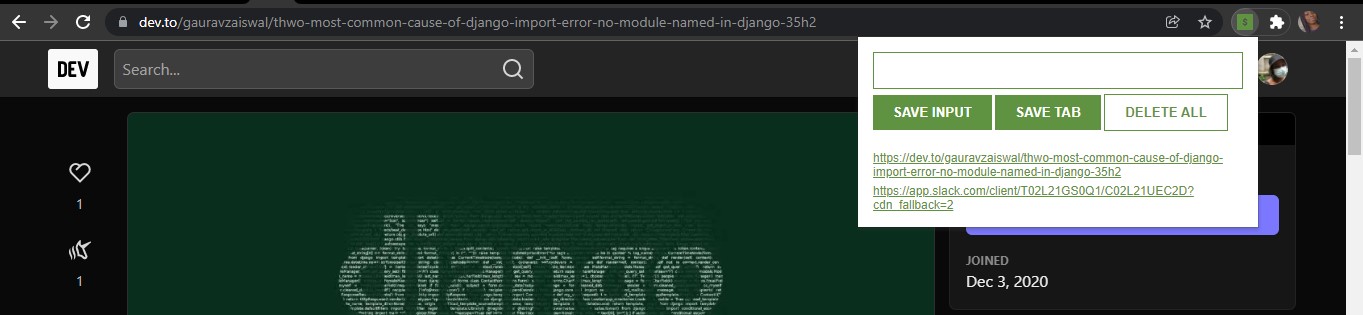
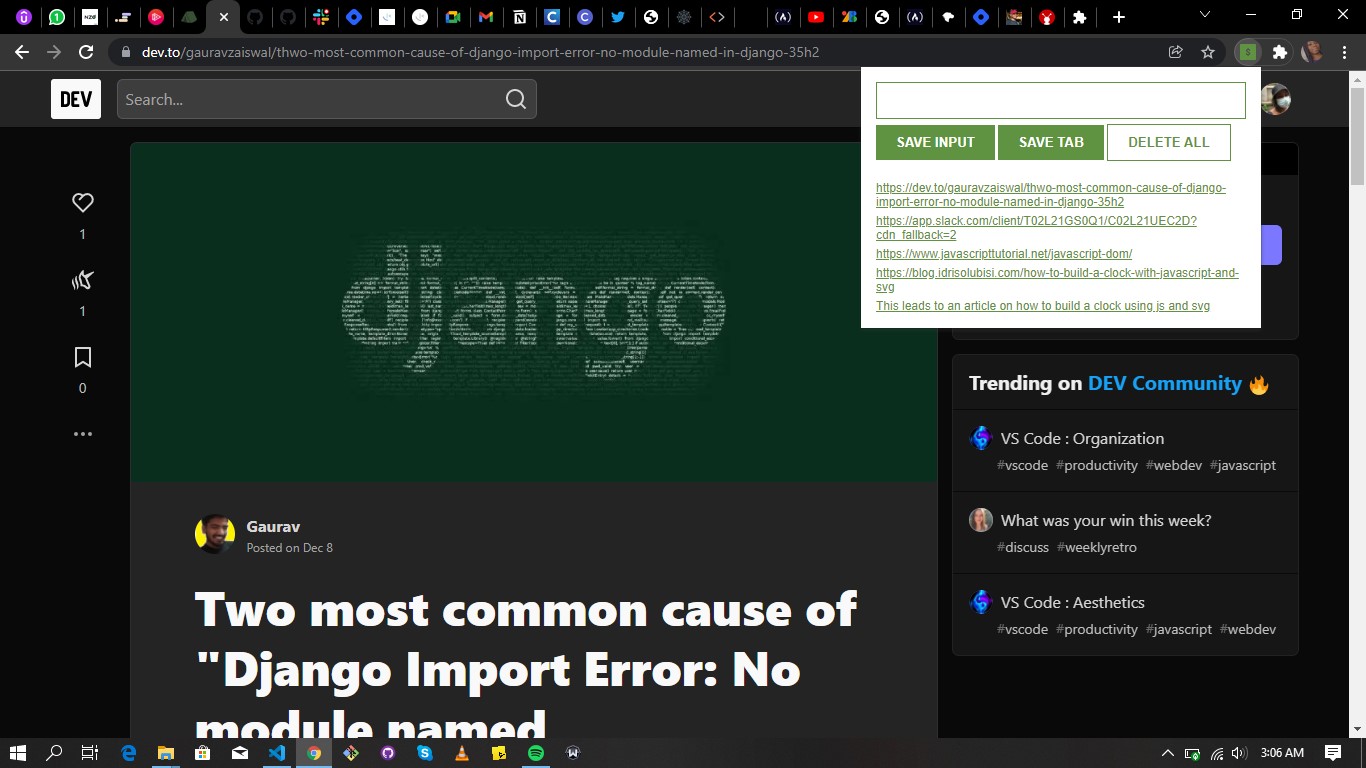
To use your extension, click on the extension's icon in your browser, and you'll find your extension already added. Save your current tab, and when you open a new tab, you'll find your previously saved tab. You can also enter descriptions or any website URL and save with the SAVE INPUT button. You'll always see your saved leads even if you refresh or close your browser.
8. CONCLUSION
Now that we have our functional Chrome extension, we can track our leads easily.
If you found this article helpful, don't forget to like, and also reach out in the comment section.
Thank you for reading my first article. You can check out my GitHub.
If you'd like to support or encourage me, you can buy me a cup of coffee (or more) below🙂. Thank you.
